BEFORE ATTEMPTING TO PLAY, BE SURE YOU HAVE THE LATEST VERSION OF JRE 7 OR 8. DO NOT USE AN OUTDATED JAVA. IF YOUR JAVA 7/8 INSTALLATION IS INCORRECT, YOU WILL HAVE PROBLEMS! ALSO A 64-BIT VERSION OF JAVA IS EXTREMELY RECOMMENDED AS 32-BIT JAVA OFTEN CANNOT ADDRESS ENOUGH PERMGEN MEMORY TO FUNCTION! THE FOLLOWING INSTRUCTIONS ASSUME YOU ARE ON 64-BIT JAVA. IF YOU DO NOT HAVE A
64-BIT JAVA, GET IT. IF YOU CAN'T BECAUSE YOU HAVE A 32-BIT OS AND/OR CPU, THEN UPGRADE TO SOMETHING FROM THIS CENTURY, PLEASE! (Seriously, it'd be $300-400 and it's been standard on computers since like 2006, there's no good excuse anymore!)
WINRAR is required to open the files, because it offers the best compression of all formats. 7Zip and WinZip may not work!
INSTALLATION INSTRUCTIONS
1) Start by downloading Minecraft. Follow these steps to ensure you have the correct version. Which is 1.7.10.
2) After downloading; Install, and Run Minecraft.
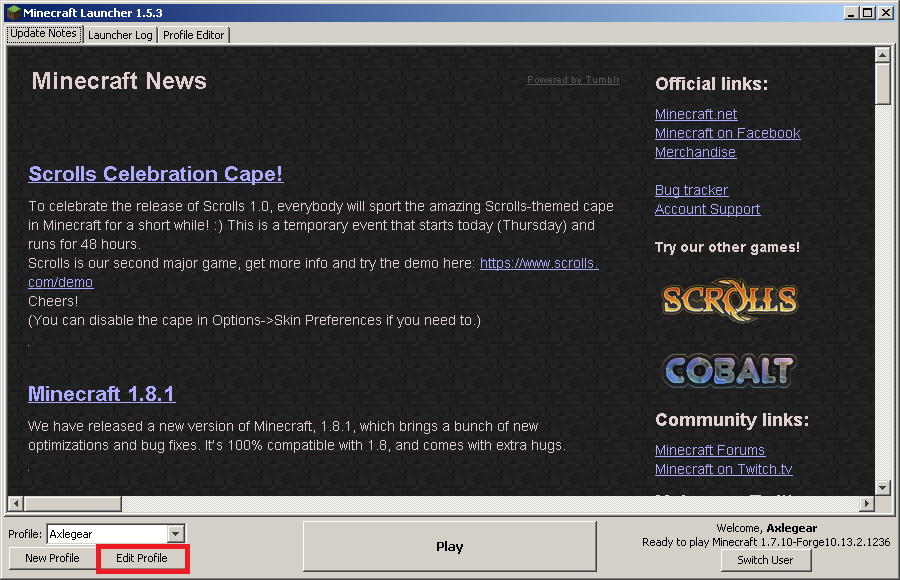
3) A "Launch Screen" will pop up. Before continuing to "Play" find the "Edit Profile" button at the bottom left.
2) After downloading; Install, and Run Minecraft.
3) A "Launch Screen" will pop up. Before continuing to "Play" find the "Edit Profile" button at the bottom left.
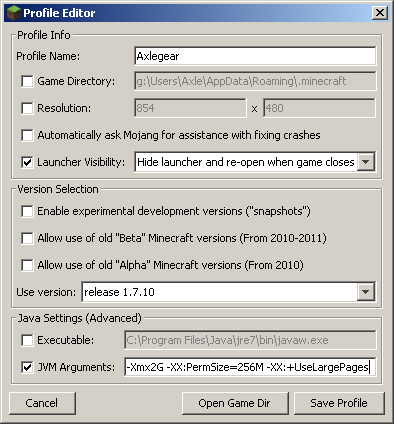
4) In the Settings Window which popped up, find where it says "User Version" and select "release 1.7.10".
5) While in the Settings Window, you may wish to set your "JVM Arguments" as per the following:
5) While in the Settings Window, you may wish to set your "JVM Arguments" as per the following:
- IF YOU'RE ON A "32BIT", "X32", OR "X86" VERSION OF WINDOWS, SKIP STEP ENTIRELY! IT DOES NOT WORK FOR YOU.
- Skip this step if on Java 8-> At the very least, you should be using "XX:PermSize=192m". You may set it higher; however, more than 512m is usually a waste. Typically, 192m is enough, but if java crashes talking about "out of memory" then you may need to increase it to 256m or more.
- It would also be wise to use "-Xmx2G". Together these tell Java to use up to 2 GB of memory, and the PermSize is permanent memory residence space, so the total would be 2240 MB. You can change this as needed to fit your system; however, more than 3GB is usually a waste and may cause lag spikes when it periodically cleans out the memory.
- Lastly, if you have a lot of memory (more than 4GB) it is wise to use "-XX:+UseLargePages" which will make memory management quicker and more efficient.
- Combining it all together it should read "-Xmx2G -XX:PermSize=192M -XX:+UseLargePages"
6) Once all of your settings are finalized, hit the "Save Profile" button, followed by the "Play" button.
7) Upon reaching the "Title Screen" find & click the "Quit Game" button at the bottom right.
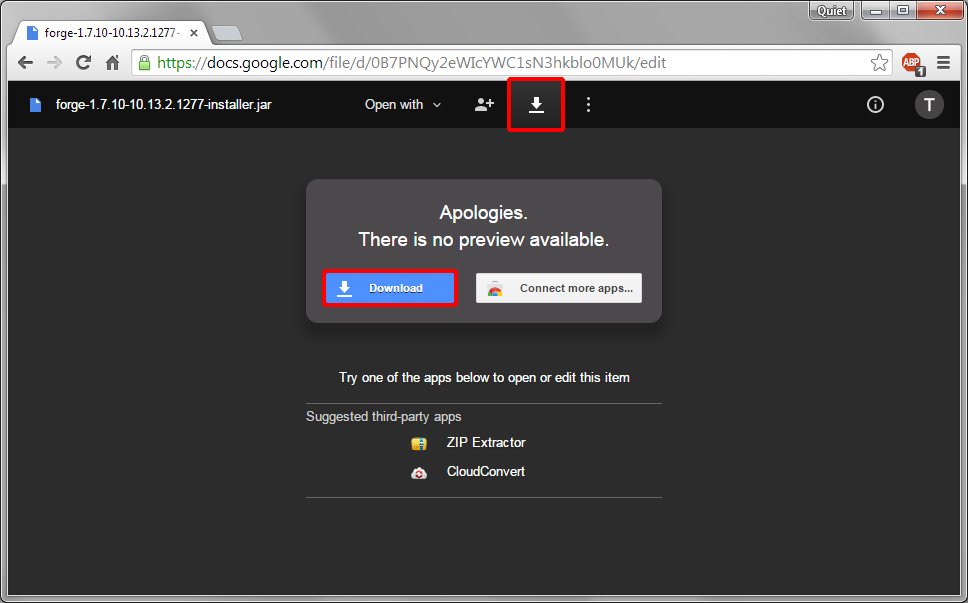
8) Now we need to install "Forge". Download Forge & install it.
7) Upon reaching the "Title Screen" find & click the "Quit Game" button at the bottom right.
8) Now we need to install "Forge". Download Forge & install it.
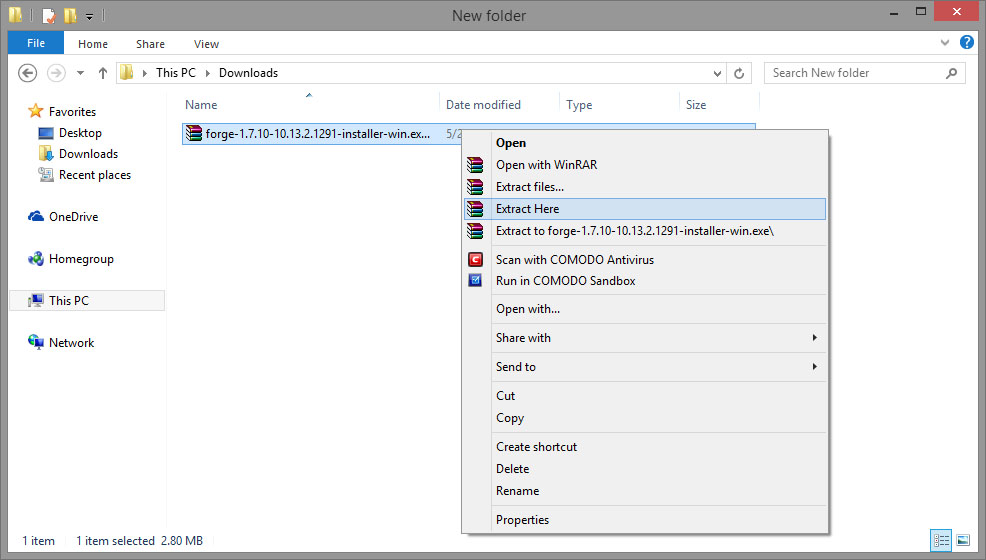
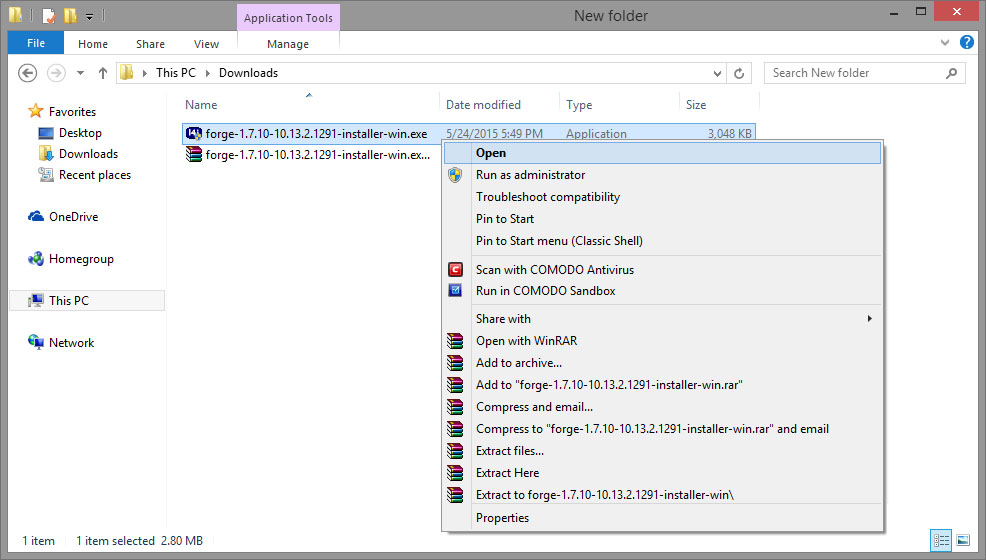
8a) To install, you will need to extract the ".RAR" file to a location you can find ("Extract Here" should be easy)
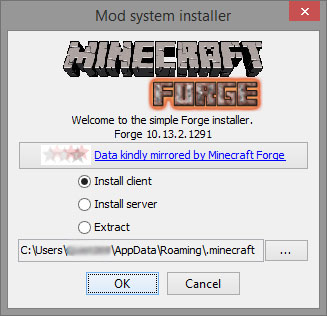
8b) Once extracted, you want to run the ".EXE" file to start the installation process
8c) When the "Mod system installer" opens, click "OK", you shou
8b) Once extracted, you want to run the ".EXE" file to start the installation process
8c) When the "Mod system installer" opens, click "OK", you shou
9) Once installed, open Minecraft & the before continuing to "Play" find the "Edit Profile" button at the bottom left. (Again)
10) In the Settings Window which popped up, find where it says "User Version" and select "release 1.7.10-10.13.2.1291"
12) Upon reaching the "Title Screen" find & click the "Quit Game" button at the bottom right. (Again)
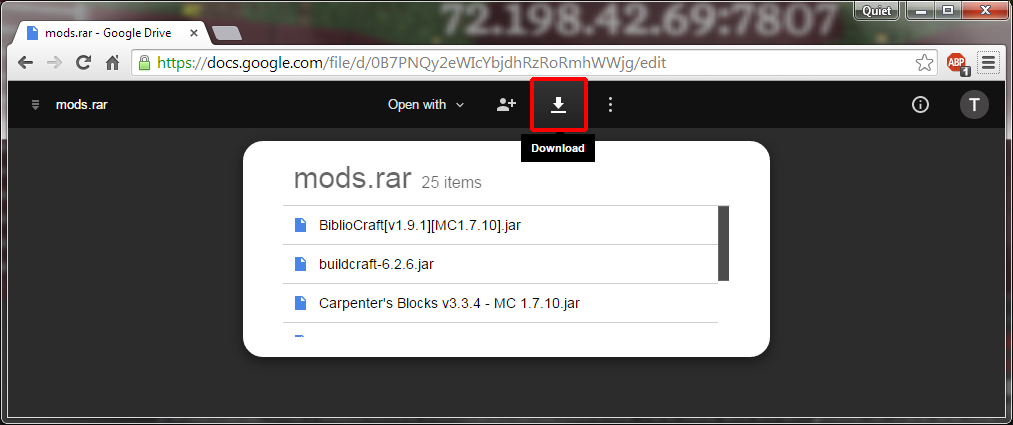
13) Now, download the ModPack (.RAR File) & open it using "WinRAR".
10) In the Settings Window which popped up, find where it says "User Version" and select "release 1.7.10-10.13.2.1291"
- This is exceptionally important to check if you are updating from a different version of Forge, as it does NOT automatically update to the correct version for you. Also, check to be sure your JVM Arguments are still set correctly.
12) Upon reaching the "Title Screen" find & click the "Quit Game" button at the bottom right. (Again)
13) Now, download the ModPack (.RAR File) & open it using "WinRAR".
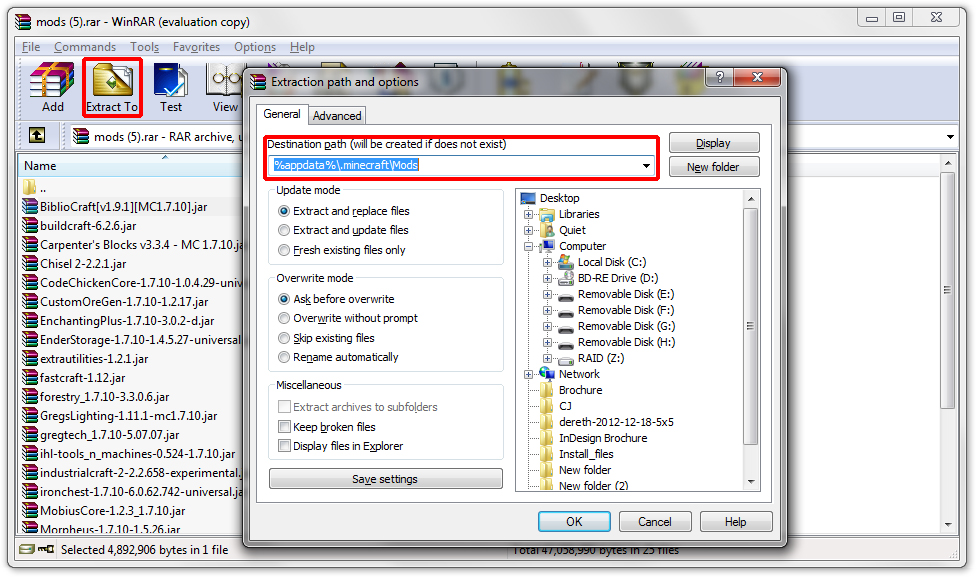
14) While in "WinRAR" click "Extract To" and in "Destination Path" Put "%appdata%\.minecraft\mods"
15) Open Minecraft one more time, and press the "Play" Button. THE FIRST LAUNCH WILL TAKE A REALLY LONG TIME, 15+ MINUTES.
17) Select "Add Server" near the bottom right. The "Server Name" is not important. The "Server IP" must be "68.97.125.95:7807"
- It depends on the speed of your computer. Each launch after that will be faster, but CAN take several minutes if your PC is slow.
17) Select "Add Server" near the bottom right. The "Server Name" is not important. The "Server IP" must be "68.97.125.95:7807"
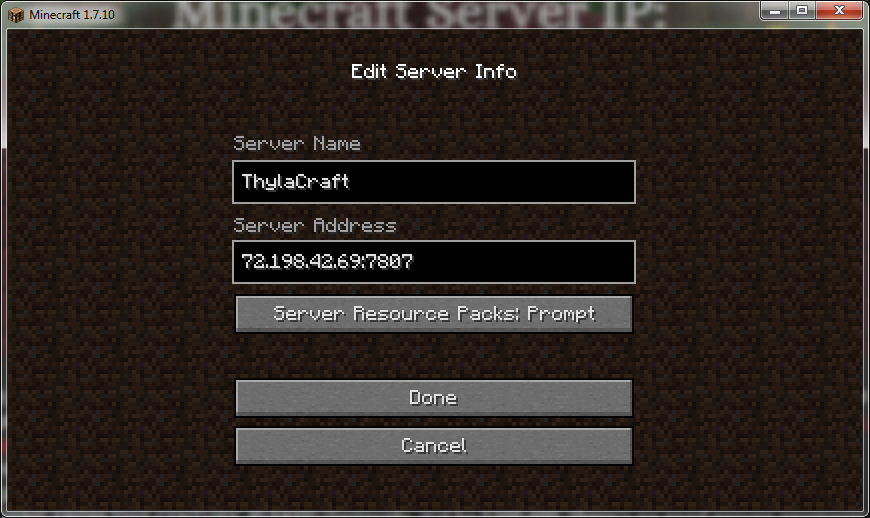
18) Click "Done" to add ThylaCraft to your Server List. Then, making sure ThylaCraft is selected, click "Join Server".
